


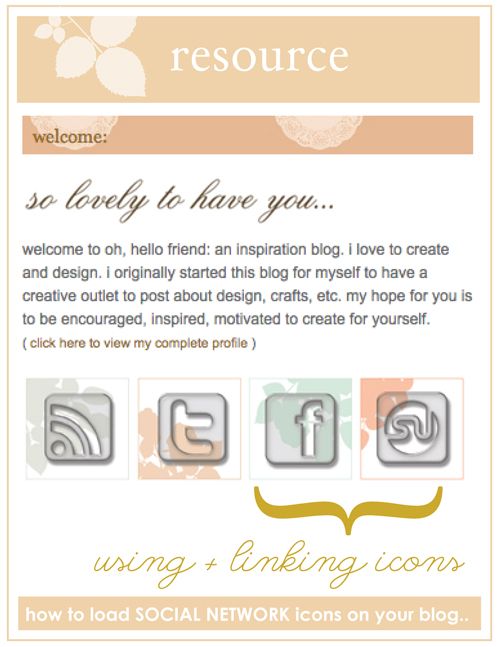
how to add SOCIAL NETWORK ICONS:
i received some comments from readers that they downloaded the social network icons that i posted about a couple weeks ago, but they didn't know where to go from there. so for this week's resource, we are going back to basics: an html code that all bloggers should know!
note: this also goes for ANY image you want to post on your blog! just change the address + the photo link! :)
note: this also goes for ANY image you want to post on your blog! just change the address + the photo link! :)
STEP ONE: Find the set you want to download -- LOTS available for free download! Here are a few places I've found free icons at: 25 amazing social media icons set + 20 free social media icons for bloggers + collection motherload: 600 icons!
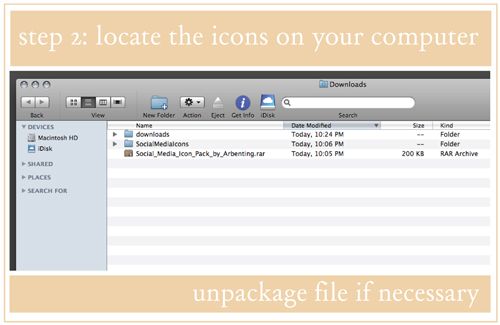
STEP TWO: locate the folder the images were downloaded to on your computer.
note: They will most likely come in a 'packaged' file.. for instance, this download is a .rar package file. This one is a .zip file -- either way, you need some sort of program to 'unstuff' them. I have "stuff it expander" downloaded on my computer and once I download a packaged file, it just does the rest for me! Then when I go to my downloads, it has the un-packaged file! Nick told me you need WinRAR to unpackage a .rar file. If anyone needs help with this, just comment with the icon link you want to download and I can possibly download them for you and send you the icons you want to use. I'll try to help everyone.. If there is a lot, maybe everyone can help eachother out :)
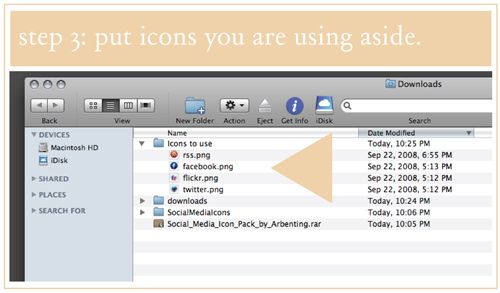
STEP THREE: place the icons you are using aside in a separate folder. In this instance, I am using twitter, rss, flickr, and facebook.
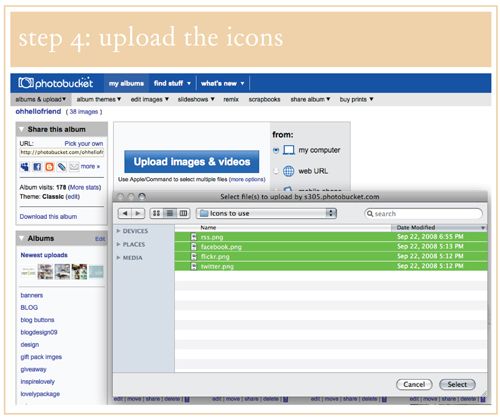
STEP FOUR. Go to an image hosting site such as photobucket, flickr - or you can host them on your own server if you have space! I will use photobucket. Upload the image files.
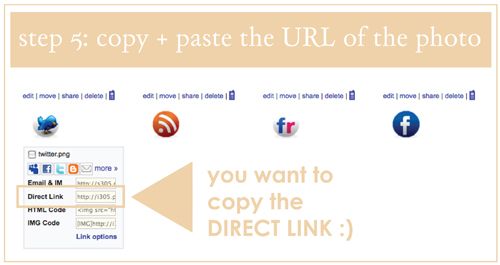
STEP FIVE: Copy & paste the DIRECT LINK or address of your image.
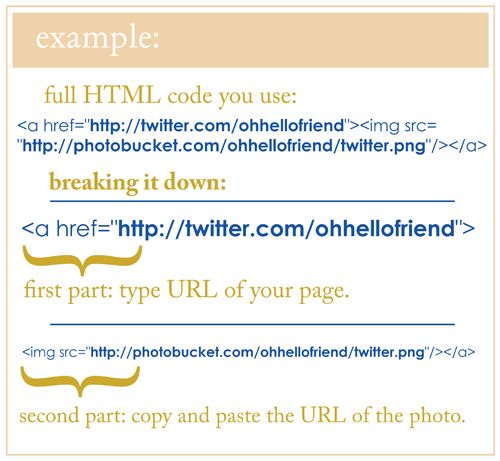
STEP SIX: Here is the HTML link that you need to post a linking image on your blog. Change the parts where I type URLofLINKgoeshere :)There is an example below:
COPY & PASTE:
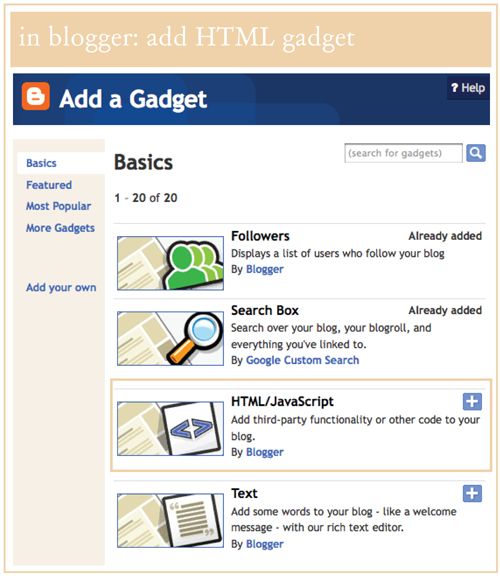
STEP SEVEN: Lastly, in blogger, click "add a gadget" in layout and add the HTML gadget ;)
copy and paste your code and YOU'RE ALL DONE! :) Hurray! Please leave comments with questions, or if this was helpful to you.
Again, this works for ANY IMAGE you want to post as a link! Use it for an email button, an etsy shop button, a friend's banner, whatever!
Again, this works for ANY IMAGE you want to post as a link! Use it for an email button, an etsy shop button, a friend's banner, whatever!


Danni,
ReplyDeleteYou are a lifesaver! I'll definitely try this out when I'm not so tired! Glad to see it wasn't only me who was having issues with it :-)
xoxo,
Micaela
Danni these blogging tips have been awesome! I am waiting for a day that I have some uninterrupted time to try all this stuff out on my blog! Thanks for the tutorials. :) Have a great weekend.
ReplyDeleteThis is great! Thanks for the tutorial, this must have taken you a while to lay it all out for us.
ReplyDeleteMUCH APPRECIATED!!
thank you so much for posting this!!!!
ReplyDeleteSuper helpful - I got it to work! Thanks so much - you rock!
ReplyDelete