


Hello friends! Cat from brideblu again. I adore diy projects, especially ones that can be made with things you just might already have lying around the house!
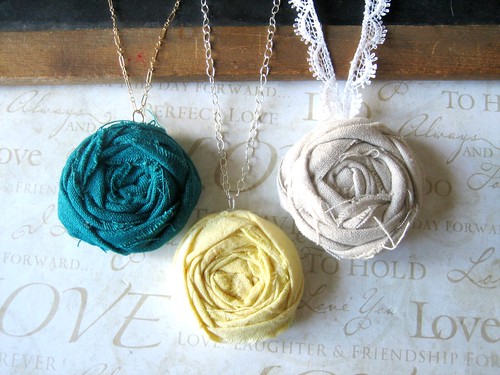
With Spring just around the corner, it seemed most fitting to show you how you can make your very own rosette necklace! I adore the idea of incorporating brightly colored fabrics into jewelry…a little pop of color always helps brighten your day!
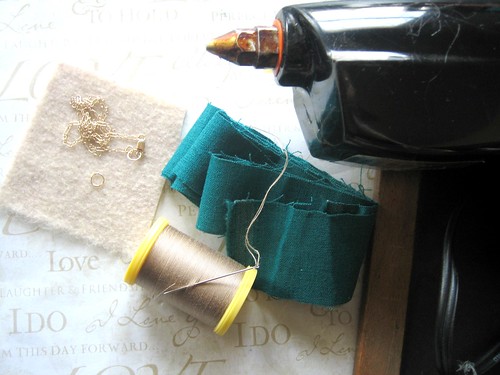
What you’ll need:
- A scrap of fabric 1” wide and at least 45” long (I have found linen and cotton fabrics are easiest to work with)
- A scrap of felt to use as backing
- A hot glue gun (or fabric glue)
- A closed jump ring
- A finished chain
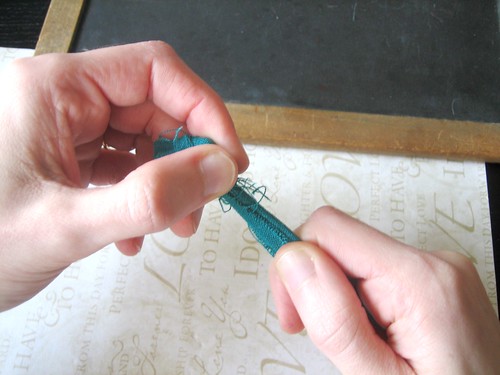
STEP 1: Fold your 1” wide strip of fabric in half and make a knot as near to the folded end as possible.

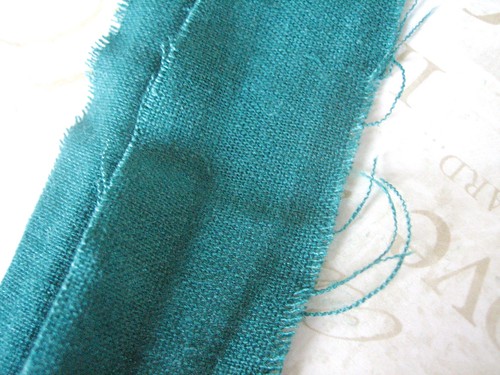
STEP 2: Holding the knot in one hand, use your other hand to pull against the fabric, giving it a slightly destructed, shabby-chic look (I promise, this effect adds some seriously fun personality to your finished rosette).
STEP 3: Fold fabric roughly in half. Using the knot as your “center” start working the rest of your fabric around it. Twist your fabric as you go work in a circular pattern around the center, placing a bit of glue every 3 twists or so.
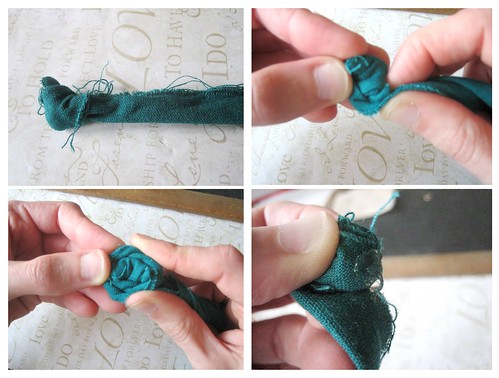
STEP 4: Continue wrapping, twisting, and gluing. You will start to see the rosette take shape.
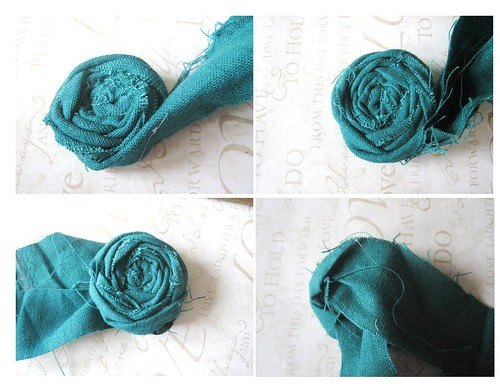
STEP 5: When you get towards the end of your fabric (or have decided your rosette is as big as you want it), end the final twist towards the back so that you will be able to hide it later with the backing. Trim the “tail”.
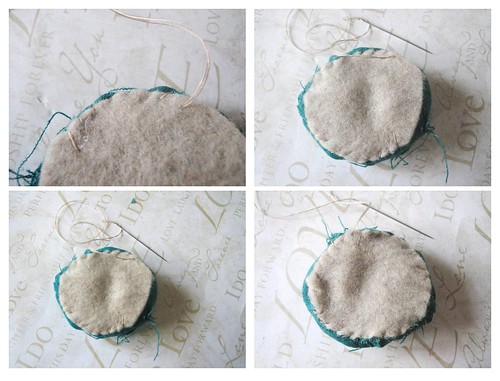
STEP 6: Using the diameter of your rosette as your template, cut out a piece of felt that is slightly smaller.

STEP 7: Stitch felt onto the back of your rosette, hiding the trimmed tail inside.
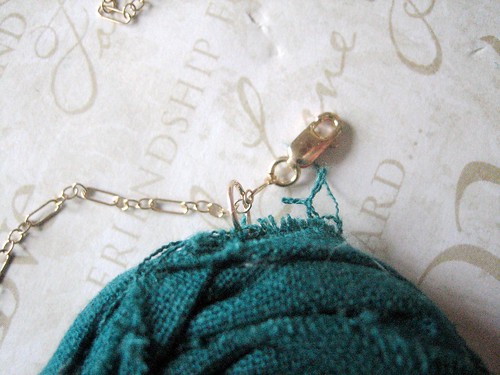
STEP 8: Position your closed jump ring perpendicular to your rosette (this will allow you to simply string your chain right through it). With a few short, tight stitches attach your closed jump ring.
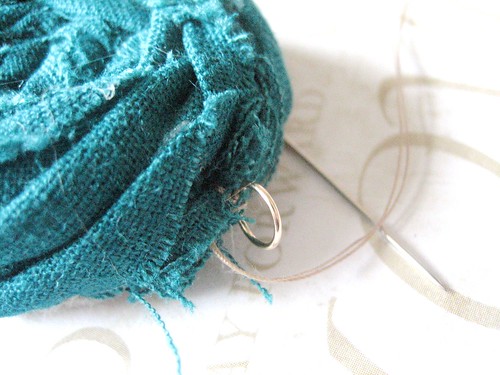
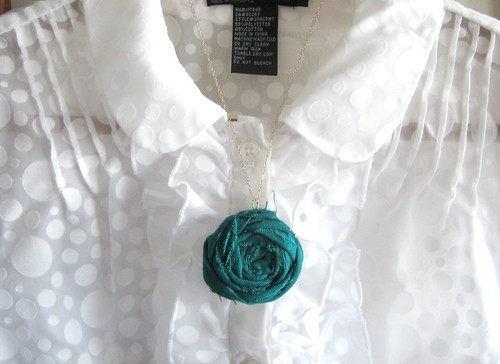
STEP 9: String your rosette onto your chain.
Voila! You have yourself a new, fun, springtime accessory.


Oh.My.Goodness! I love this and I can SO make this!!! Thank you for posting. :)
ReplyDeleteI cannot take on another project - which is a miracle o admit lol - but if I did - it would be this - they are great! I love the teal! Jennifer
ReplyDeleteLove it!! Such a simple, yet awesome idea!!!
ReplyDeletehttp://thefreckledmarauder.blogspot.com/
LoVe this! And your photos and directions are great, Cat! I am definitely going to try this...
ReplyDeleteLOVE this! Thanks so much for the idea!
ReplyDeleteThis is perfect! I think this is a perfect project to do over spring break! Thanks so much Dani. You always have the best material. In my dreams I'm an amazing blogger and Etsian just like you. Maybe one day...
ReplyDeleteThese are wonderful little beauties!
ReplyDeleteSo beautiful! Thanks for the diy, Cat! :)
ReplyDeleteI've been wondering how these are made for the LONGEST time! Thanks for sharing the DIY.
ReplyDeleteWow! You are so amazing to post this. I cannot imagine how many hours it took to do it. Thank you!
ReplyDeletethat looks amazing. I wish I had HALF that talent.
ReplyDeleteoh, i just *love* this! thanks for the post and a bit of weekend inspiration! cheers.
ReplyDeleteLooks great :) I might have to give that a try (once I clear a million other project off the dining table!).
ReplyDeleteWhat a fun project. I love projects like this!
ReplyDeletehttp://www.soapdelinews.com
LOVE this project! definitely adding it to my list of things to make! :)
ReplyDeleteI'd look twice at a woman wearing one of these.
ReplyDeleteJust linked this on twitter and will DEFINITELY be trying it later today! I love this handmade flowers and this tutorial looks to be so promising! Thanks!
ReplyDeletewhat a great way to reuse scrap fabric! easy and beautiful...just my kind of project. thanks so much for sharing :)
ReplyDeletethis was such a great diy!! i loveee the flowers :) :)
ReplyDeleteI need to get some refills for my hot glue gun! These are adorable.
ReplyDeleteooh, I like this loads and it looks so easy to make!
ReplyDeleteThis is soo cute! I'm definitely going to make some!
ReplyDeleteoh Cat is always creating and carrying the most divine items. these adorable rosettes are right up there with her other ace-ness. wonderful diy to spread the wealth - really liking the fact this one takes minimal sewing. so purdy! ♥
ReplyDeleteLove this tutorial Cat, I'm adding it to my bookmark list of DIY projects to try over the summer! :D
ReplyDeletestar-crossed smile
Really cute DIY. Lovely. :))
ReplyDeleteGreat tutorial, I love making fabric flowers for all sorts of crafts.
ReplyDeleteI have too many projects and work a regular job...where can I buy one of these. I just LOVE this necklace. Thank you. Laurie
ReplyDeleteThis is such a great tutorial! I love it! And I love the colors you picked to make the flower out of. Very nice. Thanks!
ReplyDeleteEmily Jeffords
BeautifulHelloBlog.com
this is so cute- too simple not to do! I think I'll whip up one this afternoon to wear tonight! Thanks for sharing!!!
ReplyDeleteI saw this a on pinterest!! Love the colors I'm going to try it out with some fall colors!. Thanks:)
ReplyDeleteJust wanted to let you know that our middle school craft club will be tackling this project tomorrow! We can't wait! Thanks for sharing your awesome ideas!
ReplyDeleteLove this! Was thinking about paying $ but think I will try to make instead.
ReplyDelete