


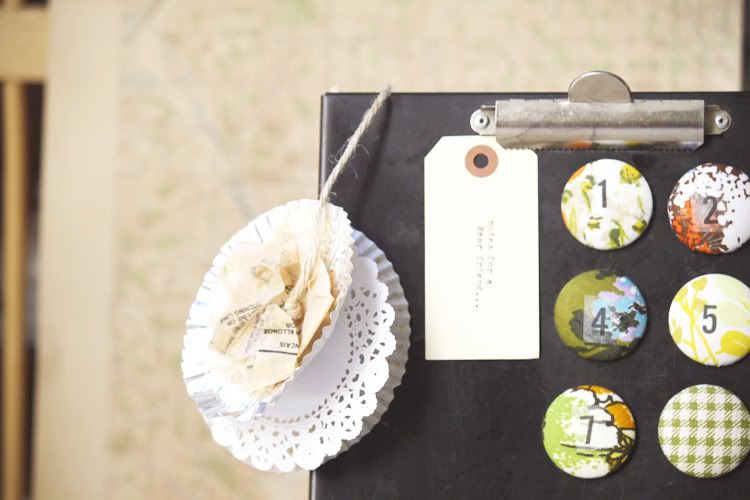
Sometimes it's nice to leave little notes around. I'm a big fan of notes, as you may know :) So I had a thought to do a little magnet message board of notes, with numbers for 1 note a day or something. Your notes can be anything - encouragement or positive message. It's a simple project, here's how to do it!
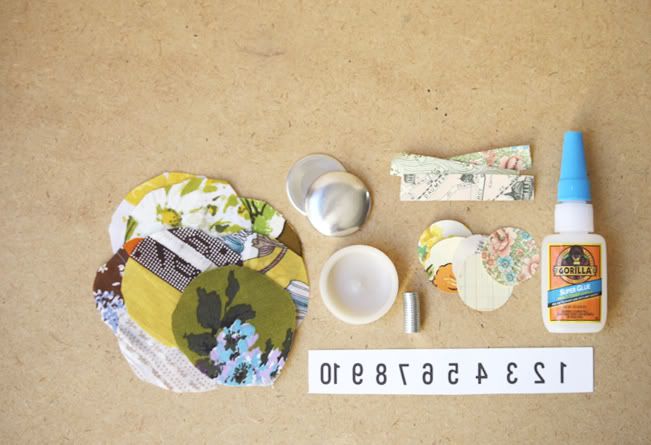
Supplies:
- Fabric
- Cover Button Kit (kit can be purchased here)
- Magnets (I used neodymium magnets, can be purchased here)
- Iron on paper
- Glue
- Paper
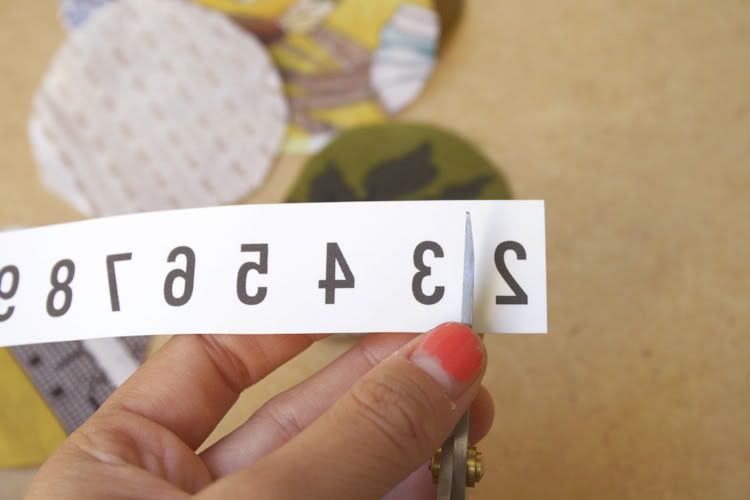

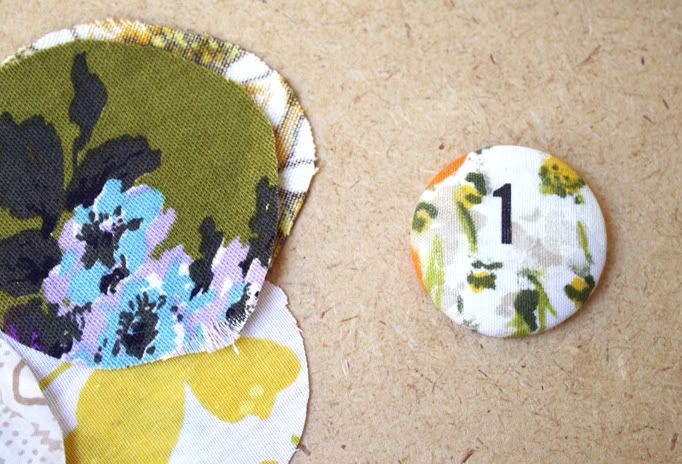
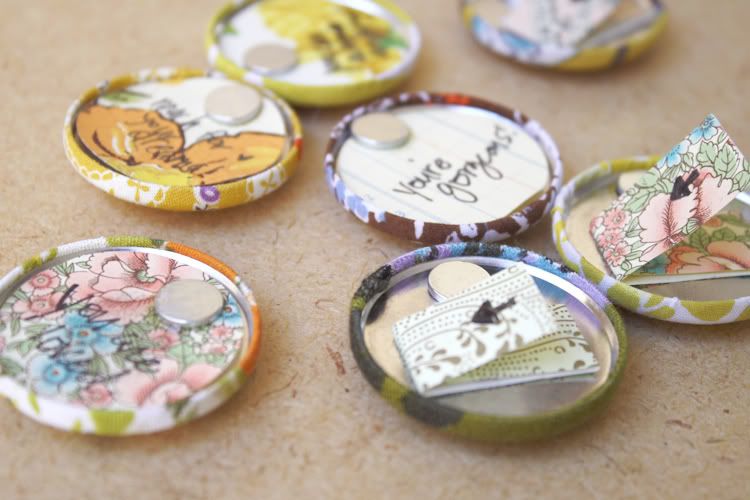
Cut out circles that are about 2.5" in diameter. It just needs to be about a quarter inch larger than the button. Print out numbers on the iron on paper and iron on a number on each circle. *note: numbers are completely optional. This can be made entirely without numbers.
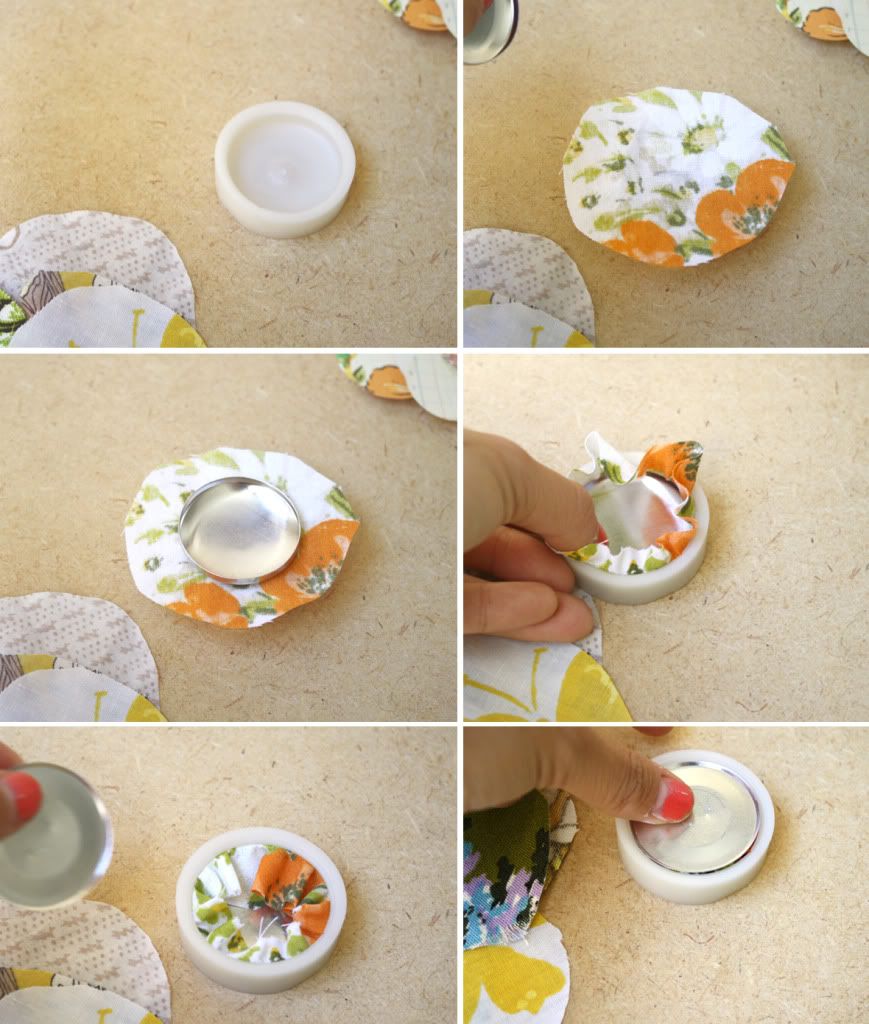

Once all your circles are cut out, you can start making the button. Start with the rubber button mold. Place a your circle piece of fabric, then the button shell. Push both into the mold, then tuck in the fabric. Place the silver backing and push again. Then simply pop out your button from the mold!
Now cut out circles from your paper and write messages on them. I did some circles, and some strips of paper that they'd have to open up.
Now cut out circles from your paper and write messages on them. I did some circles, and some strips of paper that they'd have to open up.
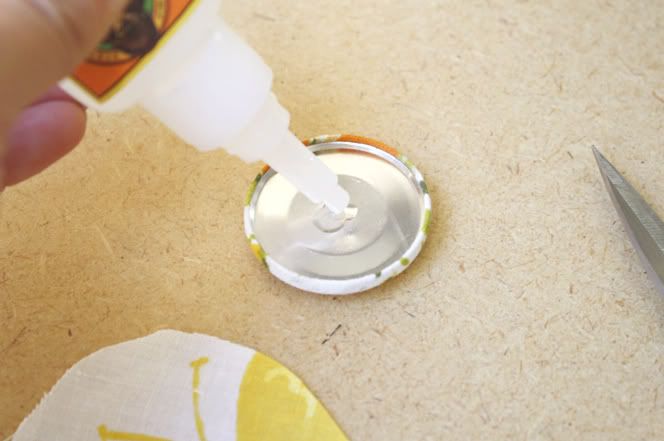
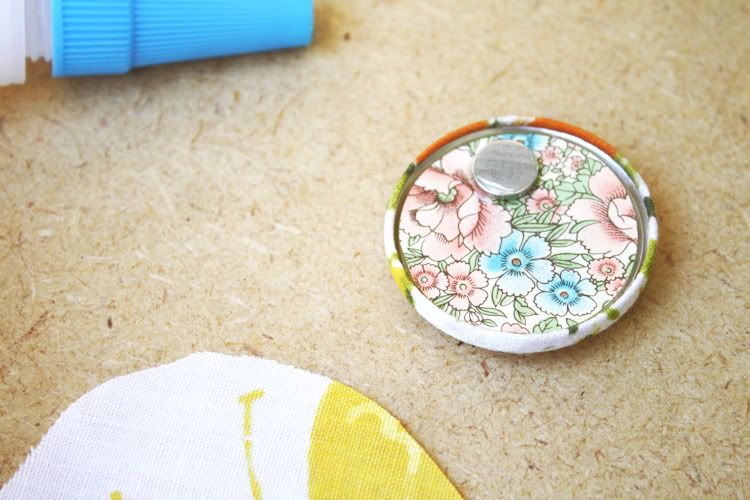
Next, place some glue on the back of the button. Place your paper message and add another dot of glue for the magnet.
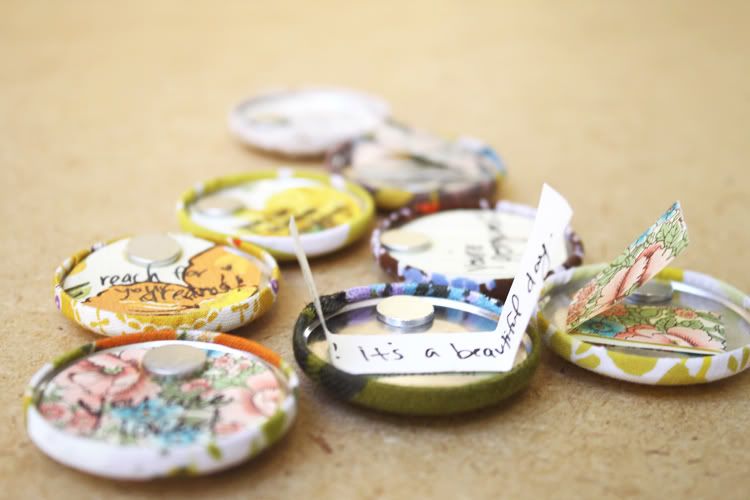
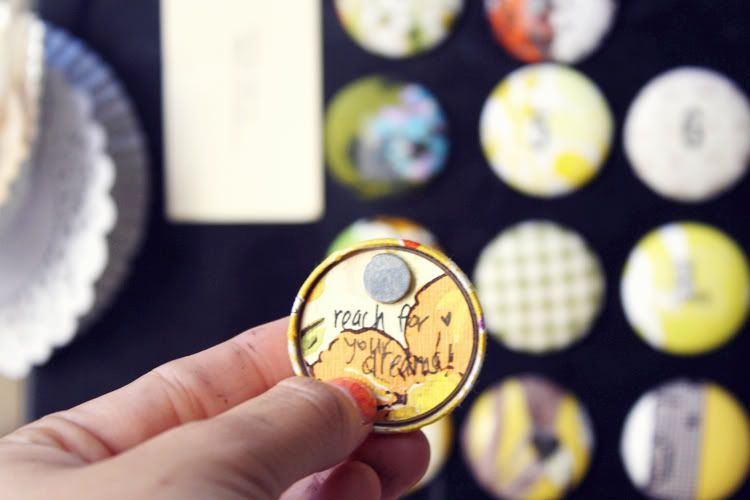
So when they pull a button, they can read a special message each day!


What a great idea. I'm always needing some new magnets. And I really want to make some fabric push pins. Maybe something like this would work. xo, rv
ReplyDeletehttp://aneclecticheap.blogspot.com/
Beyond fun! I need to make this!
ReplyDeleteWhat a great idea!!! I love the flower print too. I was just thinking about doing something with magnets lately so this is awesome!
ReplyDelete- Sarah
http://agirlintransit.blogspot.com
Great project!
ReplyDeleteCan I ask the source of the magnets? That style is pricey at Michael's, but looks much nicer than just black ones. Thanks!
How cute! One of these days, I will set aside an entire day to do all these wonderful DIYs I see!
ReplyDeleteFab idea! Would be great as a advent calendar for chritsmas too, stick one up on the fridge for every new day until the 25th!x
ReplyDeleteOh my gosh, these are so fun! Would be a wonderful idea for an advent calendar as well!
ReplyDeleteomg I love homemade magnets! I am def going to do this project!!
ReplyDeleteWow! Super Cute idea! I agree with Carrie, this screams advent calendar, with tons of pretty Christmas fabric! :) Thanks Dani!
ReplyDeleteThese are so cute and easy! I love it!!
ReplyDeletelove them!
ReplyDeleteyou are sooo good at this! i love the photos you take for DIYs, so easy to follow and inspiring. :)
ReplyDeleteThis is really sweet.
ReplyDelete♥ sécia
www.petiteinsanities.blogspot.com
this is adorable danni i didn't know about them! D
ReplyDeletelove the photos danni! what a great idea!
ReplyDeleteDo you know what size magnets you used? I looked on the site you linked and there are a lot of sizes (and they all seem really small to me). Are they really strong magnets? Thanks
ReplyDelete視訊聊天交友網
ReplyDelete視訊美女聊天
視訊美女
視訊聊天交友
成人論壇 情色論壇
情色 A片下載
A片 成人小說
情色小說