




weekly giveaway - Ruby Press:

235

November 15, 2010

Photobucket
Okay, weekly giveaway's are really back now :) This week we have an amazing giveaway from Ruby Press. I love letterpress. Remember we had a whole letterpress week? Today's giveaway is from Ruby and she's offering up a whole set of your own custom calling cards + notecard set! Be sure to check out her shop and visit her at rubypress.com.

and Note Cards, $120 value!
Please tell us a little about yourself and how you got started in letterpress: My background is in branding and identity design but I have always enjoyed making things with my hands. I took a book arts class in deign school and I thought I was in heaven. It soon became my pipedream to one day have my own letterpress shop. One day the stars aligned and that dream came true and I have been living happily ever after ever since.

What presses do you own: I have an Old Style Chandler + Price platen press from the late 1800’s (we call him Vern) and a New Style Chandler + Price from the early 1900’s (Rudy).

What do you love about letterpress: I love the clank of the machines, the feel of the impression on the paper, and mixing my own ink color until it’s just right.

3 chances to win!

( COMMENT TO WIN )
simply visit Ruby Press and leave a comment
with your favorite item from the shop.

( +1 EXTRA ENTRY )
Twitter or Facebook about this giveaway.
Come back & comment with the link!
*note: if you twitter, p
lease tag it with @ohhellofriend
so I can keep track of entries!

( +1 MORE EXTRA ENTRY )
Become a twitter / blogger follower or a facebook fan,
Leave a comment letting me know which site you follow for an extra entry!
*note: please only comment once for what site you are a follower of

Giveaway ends on monday, November 22nd at 8am, pst
Please check back next week to see if you are the lucky winner!
Photobucket

happy friday:

19

November 12, 2010

Photobucket
Hi Everyone! Just wanted to drop in with a quick note that I reopened my etsy shop a couple days ago :) This weekend is my last couple days to get ready as I am selling at UCI all next week! Do you have any exciting/fun/interesting plans?

Thanks to all the lovely guest bloggers that were here this week: Amanda, Xenia, Barb, Julia, and Nora! I'll be back to regular posting next week! xo.

guest blogger - Nora from Nora Griffin:

14

Wow, that week went by so fast! I've actually met this lovely lady at a craft show, she is really sweet and talented. Nora is here sharing a cute little diy card project - she'll also be back with a studio tour too! She's on twitter too! Thanks for being here today Nora!

Photobucket
Hi, It's Nora from Nora Griffin! Today I thought we’d make a little something, especially since you’ve seen how I have more than enough supplies. One of my favorite things is handmade cards and here is how I made a little set recently.

I started with an old, falling apart dictionary, tearing out a few pages for the card background.
Photobucket

Next up is picking just the right stamp. I used kraft
colored cardstock for the card base, cut down and adhered the dictionary paper.

Photobucket

I used a paper distresser dragged along the edges to give the card a worn look.

Photobucket

I stamped a tree image right on top of the dictionary text.

Photobucket
Photobucket

Then I took a minute to dig through my ribbon jars to add a little more embellishment.

Photobucket

First though I stamped a greeting and mounted it on the card with foam tape to give it dimension.

Photobucket
Photobucket

The card is all done!

Photobucket

After making three matching cards…I did a little more stamping to tie together the set.

Photobucket

Here’s the set ready to be given as a little gift.

Photobucket
Thank You Stamp: Catslife Press
Ink Pads: Clearsnap
Paper Distresser: Amazon

guest blogger - Mr and Mrs Globe Trot:

16

November 11, 2010

Photobucket
I have a lovely guest post for you today, friends.
I'd like to introduce you to Julia + Yuriy: Photobucket
Julia + Yuriy share the same wedding day as Nicholas + myself! Except the day after their wedding, they packed their bags and went abroad! They are photographers based in Seattle and the combination of pro photographers + travel is a formula for fabulous photos! I just had to share.

They are keeping a travel blog that you can see here at Mr and Mrs Globe Trot. Can I say I was a just a bit jealous when I heard of her adventures traveling to all these amazing cities? ;) Okay okay, I am definitely more inspired than jealous though. When I received Julia's email, I thought what a fabulous/wonderful/amazing opportunity for these newlyweds to experience together! Anyway, Julia submitted some photos of their travels and I asked her to share their story with us - hope you enjoy these beautiful photos as much as I did!

Photobucket
Photobucket
Photobucket
Photobucket

We are Julia and Yuriy Manchik. We photograph people and weddings together, based out of Seattle, WA. Before we were even engaged, we talked about traveling the world together. We decided there could be no better time than immediately after our wedding, which took place a little over a month ago on 09/25/10 (same day as Danni and Nick!). Without work, school, or friends as distractions, we know we'll grow strong as husband and wife at an amazing rate. After the big day, we packed our bags for half a year and ditched the country. Naturally, as wedding photographers, we can't put our camera down anywhere we go. Mr and Mrs Globe Trot serves as a photo journal of our travels. Our goal is to explore places, culture, food, people, and fashion with our camera. We plan to return home 6 months after the wedding, absolutely broke, but loaded with unforgettable memories, and more in love than ever. Already checked off: Paris, London, Croatia, Montenegro.

Next up: Greece, Turkey, Thailand, and beyond"
Photobucket
Photobucket
Photobucket
Photobucket
Photobucket
Next up on the blog this week will be images of our stay in the land of the gods--Greece. We didn't mess around but headed to the most beautiful island first, Santorini. As we drove up a steep set of switchbacks in a packed van, I couldn't help but gawk out the window at the water getting further away below us and the ferry boat becoming toy-sized. We tumbled along on the side of a cliff, which was formed by a volcanic eruption thousands of years ago. Since we arrived at night, we had to anxiously wait for the next day to get views of the island and the Aegean Sea. The following morning we were nearly blinded as we stepped out of our hotel room. The buildings are so white it hurts to look at them. Rows and rows of bright white blocks. Many had painted their doors, trims, and shutters bright blue, the color of the clear skies. Outside every front door stood neat potted plants and cacti, the clay pots often cemented down so the wind wouldn't take them. We wandered around a maze of narrow stone streets and painted steps that connected the houses. The buildings of the city are clustered tightly on top of high, ragged cliffs that dropped sharply into the sea below. We were not expecting such breathtaking views. Restaurants trying to lure in tourists advertise "sunset views" on their signs. We chuckled to ourselves because you can get an excellent look at the sunset [and more] from just about anywhere along the sidewalk that lines the cliff. It didn't take us long to agree that this must be one of the most beautiful places on the planet.

( don't forget to follow their travels at their
travel blog: Mr and Mrs Globe Trot )

guest blogger - Barb from Knack Studios:

14

November 10, 2010

You all know Barb from Knack Studios - she's just the sweetest :) I really love this DIY she's put together for us today, how brilliant! I personally have a lot of jewelry so this would be just perfect for me, what about you? If you haven't seen her blog, you must stop by. Follow her on twitter and facebook as well! Thank you x 1000 Barb for putting this together for us today!


Hello, hello! It is wonderful to be here with all of you today! I have a little project up my sleeve, and wanted to share it with you.

I used to make these jewelry stands all of the time, but have gotten so busy with my furniture friends that I neglected the small projects!

Then, a few months ago a friend of mine asked me to make her a couple, and so I decided to whip out all of my tools and give it a whirl! Are ya ready?! Let's get to creating!


Materials:

*modge podge
*square wooden bases { I purchased mine at Hobby Lobby, but you can use any square of wood that you like!}
*old balusters
*wallpaper
*nails
*hammer
*nail gun
*small paint brush
*spray paint
*found pieces to add detail
*screws
*orbital sander
*scissors
*amazing goop epoxy

Instructions:
1. Turn the wallpaper sheet over on the reverse side and measure and trace your block of wood on the paper. Then cut out your square of wallpaper.


3. Use your small paint brush and apply modge podge to the wood base. Apply the paper, making sure that you press firmly and make sure that all of the air bubbles are out. I will add that if you would like a distressed look, you can sand around the edges of your base to distress the paper a bit, but make sure it is good and dry before you sand.

4. Let the paper dry and then put a coat of modge podge on top of the paper for protection. Set the base aside.

5. I chose to paint the balusters that I had a really great gray/blue, but you can paint them any color that you like! You can also leave them unpainted....the choice is up to you.

6. Once the paint is dry, get out your orbital sander and sand over the baluster until it is distressed to your liking.

7. Go back to your bases and put a small dab of epoxy on the end of the baluster and attach it to the base. Make sure that it is centered on the base, and that it is secure for the drying time.

8. When the glue is dry , it's time to pull out the compressor and nail gun! { my favorite part!} Flip the jewelry stand over and shoot at least three nails into the bottom of the base into the baluster attaching the base securely. Please make sure that you use all safety precautions when using your power tools!

9. Now is the really fun part! You get to add all of the details! Gather any and all found objects, old hardware, knobs, etc. and figure out placement on your jewelry stand. I like to put some sort of knob about halfway down for added hanging space. But you can use whatever you think looks best for your piece.

10. The baluster has four sides, and you want to use three nails per side. Take your hammer and place one nail in the upper center of the first side. Place the next two staggered on either side. Repeat this step on all sides.

You are ready to hang your jewelry on your new fantastic piece! I hope you enjoyed this project, and thank you for having me here today!

guest blogger - Xenia from Saturday Morning Vintage:

11

November 9, 2010

Today we have Xenia from Saturday Morning Vintage! She's sharing some really cool ideas for repurposed uses for vintage finds. Love it! I'm a big fan of Xenia's blog + shop, she has a lot of creative ideas and she had a 'customer appreciation week' on her old blog, which inspired me to do my own too! (a new customer appreciation week planned for early 2011!) Enjoy!

Repurposed: New Uses for Vintage Finds

You’ll never happen to pass up another vintage find because you don’t know what you would do with it, even though it’s really, really pretty or interesting.

photo source: grace light + design sponge

Before: metal tins to hold coffee, peanuts, and other kitchen staples
After: container to plant your favorite flowers and other plants

photo source: niknaknan

Before: metal trivet to protect your table from warm pots
After: display piece for all of your favorite photos / notes / flashcards / postcards

photo source: deathmachine

Before: metal and glass frogs to hold flower stems to create the perfect arrangement
After: can hold pens / pencils / paint brushes upright, and show off your favorite photos

photo source: allabouteve

Before: metal wire rack to hold a collection of records
After: spot to organize your cookbooks by author or cuisine

photo source: Pottery Barn + sarahpead

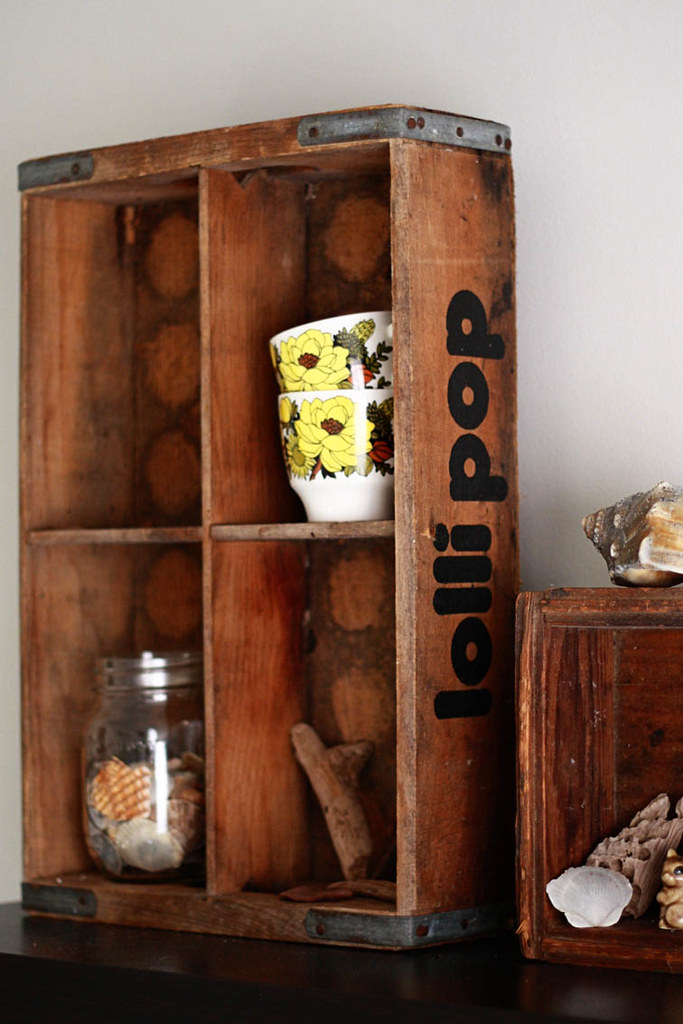
Before: wood crates to ship soda bottles to grocery stores and restaurants
After: set the stage to highlight your favorite collectibles,
and keep your magazines and books tidy by your
bedside or next to your couch

photo source: lakbdesign

Before: fireplace to take the chill out of the coldest of evenings
After: nook to house your collection of colorful books

photo source: Paper Lady Invites

Before: pretty plate to hold the fanciest of meals
After: chalkboard message center to jot down your
grocery list or a sweet message for a loved one

guest blogger - Amanda from joy ever after:

26

November 8, 2010

Hi everyone! Just wanted to let you know we have a series of wonderful guests here at oh, hello friend this week while I prepare for lots of upcoming craft shows! (7 more to be exact) Today is the lovely Amanda from Joy Ever After - a great + inspiring blog, always filled with the prettiest pictures :) Hope you enjoy the DIY project she's put together for us! Have a fantastic week friends.

Photobucket
Hi there! I'm Amanda from the blog Joy Ever After. I had the perfect project in mind when Oh, Hello Friend asked for guest contributors. The wall by my front door was begging for attention, and here is what I did.

Photobucket
Supplies: 3D hearts (I found these at Urban Outfitters, but I've also seen similar ones at Hobby Lobby), coat rack, wall type (www.wordsanywhere.com)

Photobucket
Tools: Level, hammer, nails, screw driver, mounting squares, and tape for marking

Photobucket
To begin, I marked the wall where I wanted each of the elements. (see fig. 1)

Photobucket
The hearts did not have any way to hang, so I drilled holes in the back of each one. (see fig. 2)

Photobucket
Next, I applied the text to the wall following their instructions—taping the top and peeling off the underneath layer. (see fig. 3)

Photobucket
Then I put nails in the wall for the hearts, and used the screwdriver to attach the coat rack to the wall. (see fig. 4) Before mounting, I reinforced the hearts and coat rack with the mounting squares.

Photobucket
Photobucket
Decorating with objects and type makes for unique wall, and now I have a fun greeting for guests! Thanks so much to Danni, for letting me share with you!