skip to main |
skip to sidebar
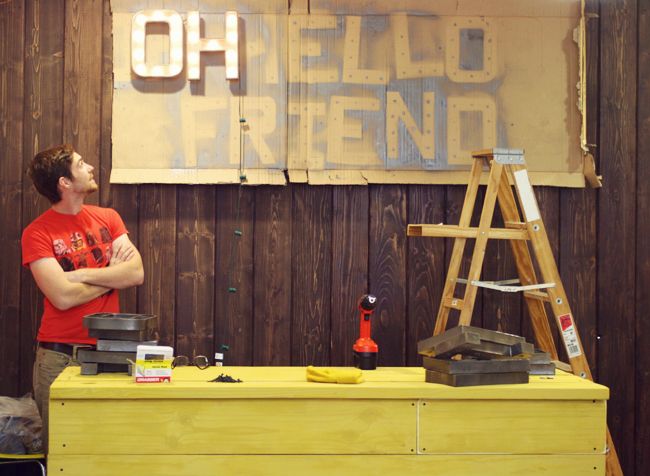
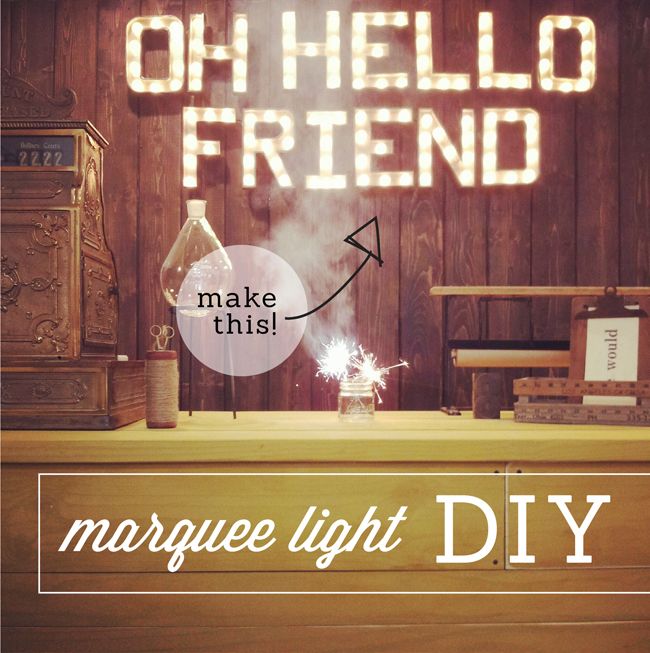 I know some of you have been waiting for this so here is the DIY on the marquee light sign Nicholas made for our shop! This was a really fun project. We looked at getting it custom made with real metal but the cost was about $2,000. After I showed Nick the DIY from Jordan, Nick did some of his own research and found this DIY from Crafts Unleashed and decided he'd try to make it himself.
Supplies:
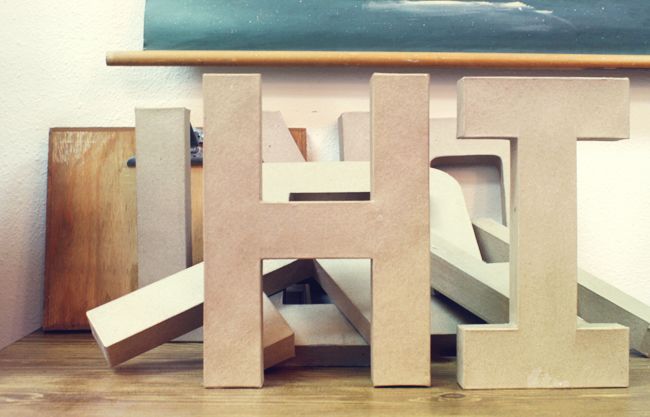
- 12" Cardboard letters
*we bought ours here at Joann's so we could pick them up right away instead of wait
for shipping. they happened to be on sale for $2.99 but if yours aren't on sale, don't forget
to use a coupon for extra savings! If you don't have a Joann's near you, the letters
are also available here at consumer crafts!
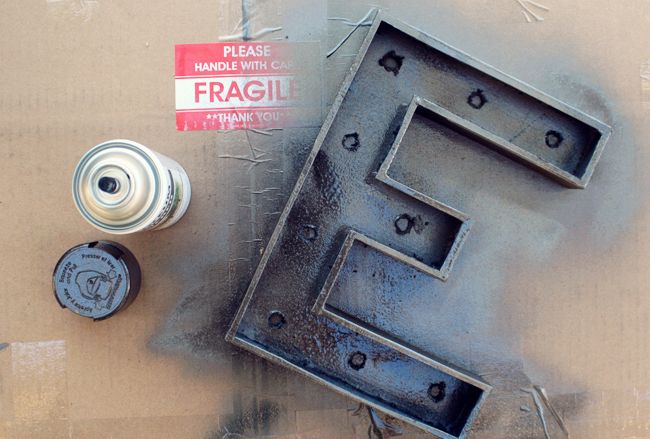
- Spray Paint
*we used Rust-oleum Hammered in Dark Bronze to get the real metal look.
We tested a few different colors though so you may want to do the same
to make sure you're getting a color you like.
- String Lights (we bought ours from Target)
- Drill
- Xacto / Blade
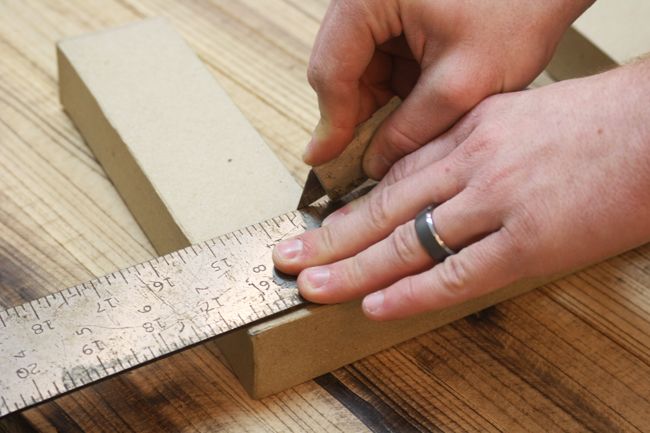
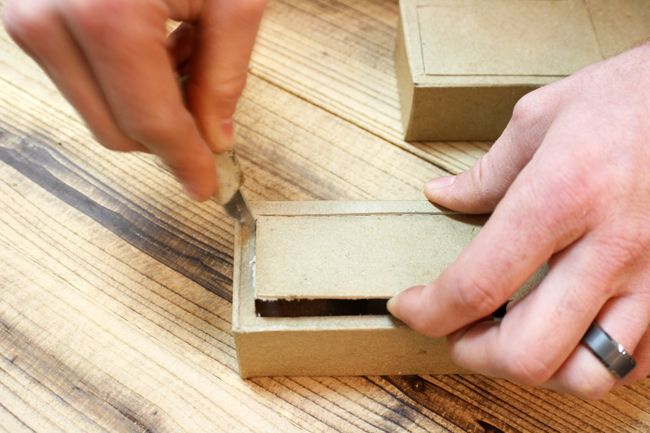 First you're going to take a straight edge and cut out along the edge of the letter.
You can cut out right to the edge but Nick left a little border as you can see from the photos.
First you're going to take a straight edge and cut out along the edge of the letter.
You can cut out right to the edge but Nick left a little border as you can see from the photos.
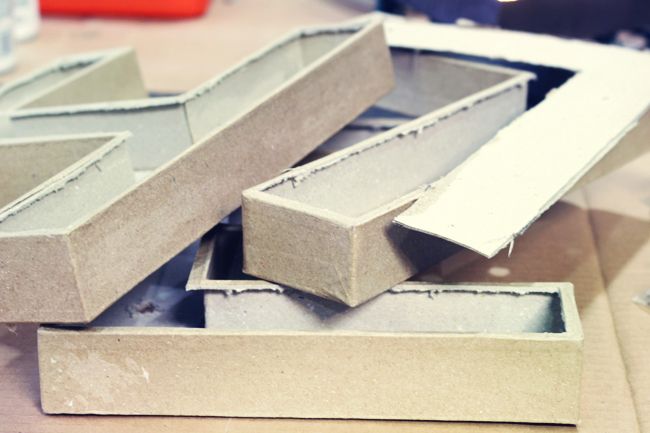
All cut out! Nick took the blade and cleaned up the edges of all of the letters too.
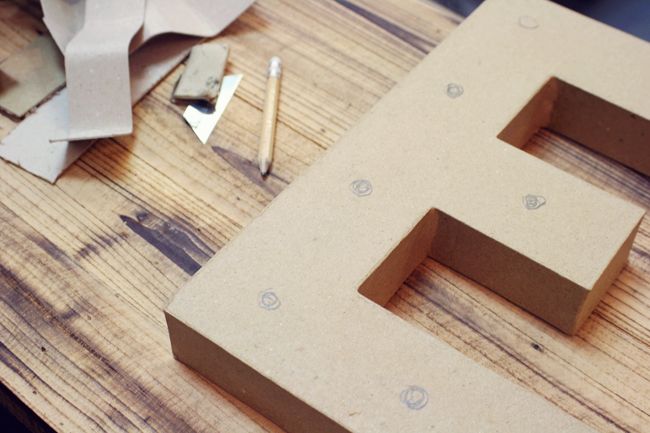 Flip the letter over and now you're going to do the bulb placement.
Figure out your bulb spacing and draw a circle for the placement.
Flip the letter over and now you're going to do the bulb placement.
Figure out your bulb spacing and draw a circle for the placement.
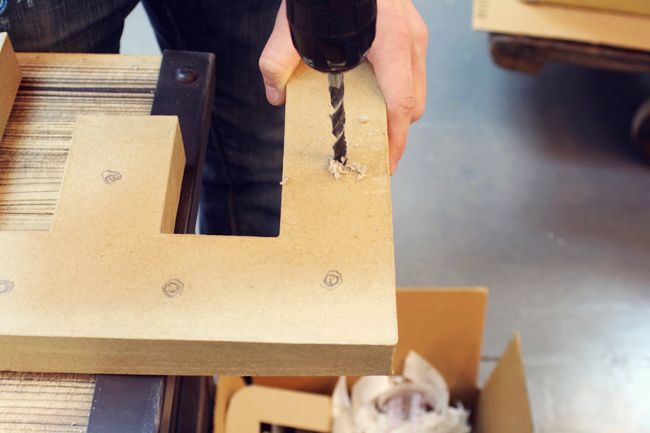 Then drill the holes. Nick used 5/16 drill bit (which was the biggest one he has) but it was not quite large enough, he had to make the holes a bit larger after he did the drilling. So if you have a bigger drill bit, go with that!
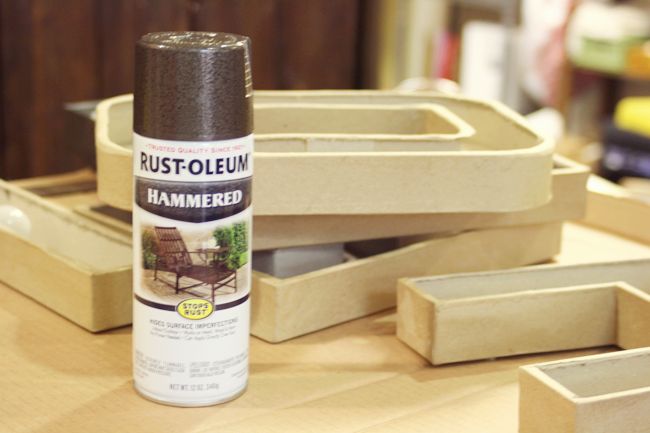

Spray paint all your letters. Spraying the back is not necessary.
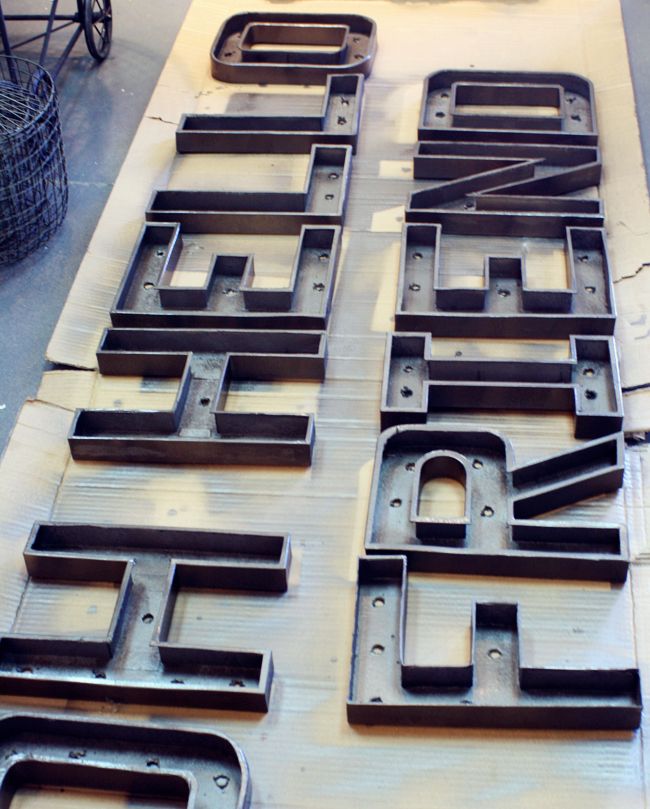 All sprayed!
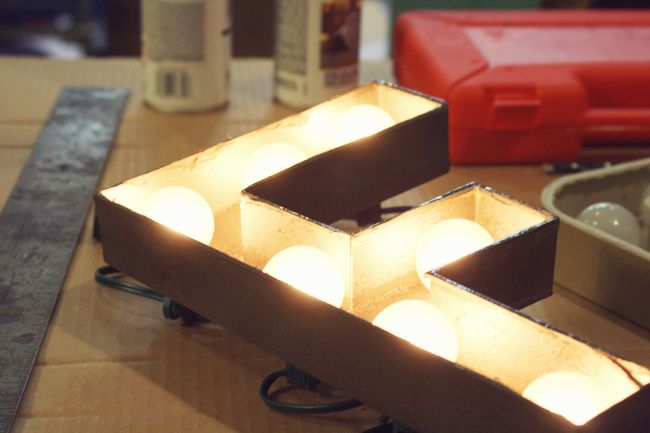
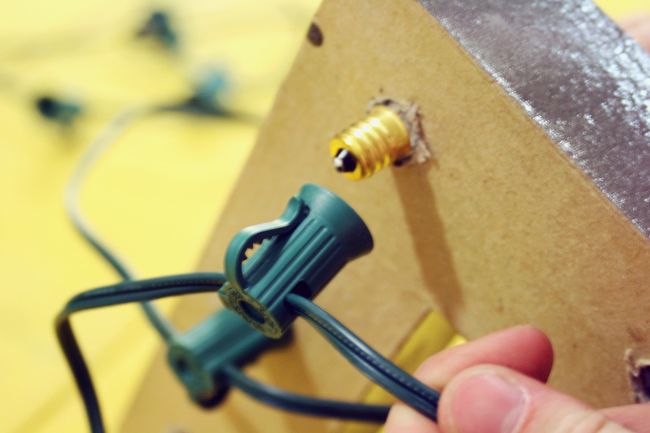 Now place the bulb through your drilled holes and attach the string.
 It depends on the letters (since some letters have more bulbs)
but Nick said you can do about 2-3 letters per 1 box of lights (1 box is 25 bulbs)
It depends on the letters (since some letters have more bulbs)
but Nick said you can do about 2-3 letters per 1 box of lights (1 box is 25 bulbs)
 To hang up our letters, Nick drilled holes in the wall and used light strings to hang the letters. He also used the cardboard we sprayed on as a template for the wall. Nick tucked all the extra string in the back. Since they have hooks attached to the lights, it made it pretty easy to hide all the extra wire.
That's it! Nick is a real diy'er, He also made the checkout table in the photo above too! In total we spent about $150 on this project! As much as having real metal would have been cool, I'll take spending $150 over $2000 any day ;) Obviously for this many letters it was pretty time consuming but a rewarding end result! If you are just doing your initials or something, it'll go a lot faster. Hope you have fun with this project.
If you do try out this project, I'd love to see how it turned out! Maybe try a color for the letters (I should have done YELLOW! ;) they don't have to have the metal look. Or you could try it with the 8" letters which would be cute. Anyway, if you have any questions about this DIY, just let me know!
To hang up our letters, Nick drilled holes in the wall and used light strings to hang the letters. He also used the cardboard we sprayed on as a template for the wall. Nick tucked all the extra string in the back. Since they have hooks attached to the lights, it made it pretty easy to hide all the extra wire.
That's it! Nick is a real diy'er, He also made the checkout table in the photo above too! In total we spent about $150 on this project! As much as having real metal would have been cool, I'll take spending $150 over $2000 any day ;) Obviously for this many letters it was pretty time consuming but a rewarding end result! If you are just doing your initials or something, it'll go a lot faster. Hope you have fun with this project.
If you do try out this project, I'd love to see how it turned out! Maybe try a color for the letters (I should have done YELLOW! ;) they don't have to have the metal look. Or you could try it with the 8" letters which would be cute. Anyway, if you have any questions about this DIY, just let me know!


Super cute! Great job guys :)
ReplyDeleteThis is so awesome, I've been wanting an ampersand like this for my studio wall. I'm totally going to give this a try!
ReplyDeleteHelen @ Cloth & Ink
HOLY MOLY! This is probably the coolest DIY ever! I am now just WAITING until I have some reason to use this. Loving the peeks at your shop - keep the DIYs coming :)
ReplyDeletexx Ashleigh
www.ashflynn.blogspot.com
Love this! Thanks for the tutorial... It would be so cute to do initials for a wedding. I an't wait to see more photos from the shop opening. I'm in the ventura area, so I'm sure ill make my way down to Fullerton one of these days
ReplyDeleteLove this! Thanks for the tutorial... It would be so cute to do initials for a wedding. I an't wait to see more photos from the shop opening. I'm in the ventura area, so I'm sure ill make my way down to Fullerton one of these days
ReplyDeleteThis is kind of genius. I was so impressed by it on IG and totally assumed you special ordered those lights and that they were metal! I love that you were able to make this out of cardboard letters. SO good. I think you just opened up a whole world of possibilities for my marquee craving self!
ReplyDeletethis is an awesome diy, i'm stoked to try it!
ReplyDeleteI absolutely LOVE this project - super impressive!
ReplyDeleteP.S. I have really enjoyed following your store-opening adventures! It's always been a dream of mine to open my own little boutique, so I'm totally living vicariously right now :)
Wow these look so amazing! love it.
ReplyDeleteZoe
http://gypsiesister.blogspot.co.uk
i love this idea!
ReplyDeleteThis is fantastic! Thanks so much for the detailed tutorial :)
ReplyDeleteWoo! Thanks so much for sharing this DIY! I really want to do this in my room! But i feel that would be silly, haha maybe i will, i don't know! But i do appreciate you sharing your DIY and Nick's handy skills! In real life they seriously look like he welded metal and pieced together this art!!
ReplyDeleteSee you soon!
xx,t
Perfect! In love!!
ReplyDeleteHi Danni! I have a 12 year old who won't sleep in his room without a light on. Too much scary movies I guess. Do you think this would be safe to be left on over night? I would just do his name or maybe his initials. Thanks for this awesome DIY. Btw love your blog :)
ReplyDeleteThis is amazing! Thank you for sharing, now I just have to talk my husband into making me one :)
ReplyDeleteIncredible! You make this look easy. Such a clever idea. Thanks!
ReplyDeleteI am in love with this Danni! You guys did just a great job! I can't wait to come visit the shop!
ReplyDeleteLove it! You & Nik are so "brilliant"!
ReplyDeleteThank you so much for the DIY ! I'm totally with you in saving money and still making cool stuff !
ReplyDelete@The Rabbit75 - yes! We leave these on all day and they are just fine! :) We tested it for a long period of time (afraid the lights may melt the paint or something) but it is totally fine! The bulbs don't really get hot, just warm. Thanks for reading!
ReplyDeleteLOVE this! It's been on my to-do list for awhile now, but now I'm totally inspired to actually do it!:-) Looks great! xoxo
ReplyDeleteWow! Lots of work but it looks fantastic!
ReplyDeleteRobyn
Turned out great! Saving this for later :)
ReplyDeleteThis is awesome! You always have the best DIYs. Can't wait to see your finished shop!
ReplyDeleteThis is by far the easiest tutorial for marquee letters I've seen. Thanks for sharing! This is definitely going on my TO MAKE list.
ReplyDeleteThanks for your Instagram help! I made mine last week and it turned out so fabulous!!! It was so easy, and by far the coolest thing I have ever made.
ReplyDeletewow, this is so great! i made a similar thing years ago with soda and beer cans with one end cut off, and taping them together with electrical tape. this looks much sturdier. (and you'll get carboard-cuts on your hands instead of aluminum cuts) ;)
ReplyDeletegreat tutorial, thanks!
You guys are rad. Love it.
ReplyDeleteYour husband is skilful. That looks aparently easy but itsn't. Was very smart of you to save those diy posts.
ReplyDeleteI can think of so many things this DIY could be useful for! This is going to be fun to make!
ReplyDeleteBeautiful!
ReplyDeleteBeautiful!
ReplyDeleteHow cool! Now, I want to try this for something in my kids room...
ReplyDeleteThis is inspired! Hope its ok if reblog!
ReplyDeleteI AM TOTALLY MAKING THIS FOR MY SHOP!!!! Thank you so much for sharing how simple this is.
ReplyDeleteLove the new shop! Congratulations!
Awesome. You guys are so creative. Makes me want to open a store just so I have a reason to make one of these signs. I don't think my husband would want one of these in our kitchen.
ReplyDeleteSo cute! Question though - do the letters get hot? I worry about it becoming a fire hazard.
ReplyDeleteSo cool! I am thinking of making these as my table numbers for the wedding. I think an 8 inch or smaller might work . Thanks for the instructions!
ReplyDeletethis looks awesome!!! tx for sharing.
ReplyDeletemy only concern is the heat/electricity from the bulbs on card board. obviously not for outdoor use, but still.
Hi! How did you hide all the wires?
ReplyDeleteHow were the wires tucked all the way in? Were you able to see the wires from the side?
ReplyDeletethis is genius! xx
ReplyDeletewww.vicariousLA.com
i love this idea and can't wait to try it, but i'm a little concerned about fire safety. With the hot lightbulbs next to the cardboard and spray paint, what wattage should be used/avoided?
ReplyDeleteI want to make this for my new apartment! Now I have to decide what word to do? Maybe Chic or Lab for the 2 chocolate labs? Ideas!!
ReplyDeletelove love love!!! but yes.. does it get hot? Safety? i assume you have the lights on all day when you are open in the shop? Does it get hot?? THANK YOU!
ReplyDeletelove love love! same questions... do they get hot? i mean i am sure they are on for a long time in your store when you are open? Any issues with that?? thanks for the tutorial!!!
ReplyDeleteAwesome!!! I leave for a Country Living Magazine show tomorrow and I wish I would have seen this sooner. Totally doing it for the next one! Thanks!
ReplyDeleteI loved your tutorial!! What an awesome idea! I made 2 marquee letters and posted it on my blog www.wandernvintage.com. While I was screwing in the light bulbs to the card board I started to wonder how safe it is? I am guessing you haven't experienced any problems?
ReplyDeleteohhhhh such a great tutorial! I'm in love with these letters!
ReplyDeleteI enjoyed this DIY so much that I decided to do one myself!
ReplyDeletehttp://www.heyyehblog.com/2013/08/diy-marquee-light.html
I love this! We are going to decorate our finished basement in a "movie" theme so I've been looking for a marquee tutorial. I would love a better explanation of how you actually hung them and hid the cords - also do you see the cords connecting each letter?
ReplyDeleteI LOVE these!!!! What a genius way to make them!
ReplyDeleteDid these fair well being on for more than an hour? I want to put something similar in a storefront window on a timer, but am worried about the lights heating against the spray painted cardboard.
ReplyDeleteI'm interested in doing something like this for a storefront window display on a timer. How do you feel these would fair being lit for a few hours? I'm worried about the heat from the light bulbs against the spray painted cardboard.
ReplyDelete